In a world where mobile phones have become an extension of our hands, a customized app has become necessary for businesses looking to succeed in the digital age. But let’s face it, creating an app can be daunting, and the thought of getting lost in the sea of coding and programming can be overwhelming.
However, with no-code mobile app builders, creating an app is now accessible to everyone, regardless of their technical expertise. And that’s where we come in – to help guide you through the process of creating your app, step by step.
From defining your app idea to launching it on app stores, we will take you on a journey of discovering the endless possibilities of app development. We’ll provide you with insider tips and tricks to make your app stand out in a saturated market and help you create an affordable and effective product.
We know that the app development world can seem intimidating, but we’re here to simplify the process and make it accessible to anyone with a great idea. So, join us on this exciting adventure, and let’s explore the app development world together!
Step 1: Define Your App Idea
Defining your idea is the first and most crucial step in creating an app. A clear idea is a foundation upon which your app will be built, and it will determine whether your app will succeed.
Having a well-defined app idea will help you focus your efforts and make it easier to communicate your vision to your team or stakeholders.
To develop a great app idea, think about what problems you could solve, what services you could offer, or what type of entertainment you could provide.
Make a list of potential ideas and refine them based on feasibility, uniqueness, and market demand. Analyze the competition, target audience, and market trends.
This research will help you identify whether your idea is viable and whether there is a demand for it in the market.
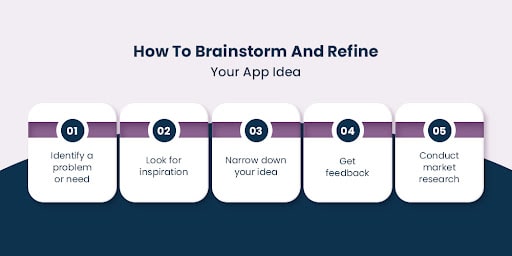
Here are some tips for brainstorming and refining your app idea:
- Identify a Problem or Need
Consider an issue people face and see if you can develop an app to solve it.
- Look For Inspiration
Check out successful apps in the app store and see if you can create a unique twist on their idea.
- Narrow Down Your Idea
Once you have a list of potential ideas, choose the one that aligns with your skills, interests, and target audience.
- Get Feedback
Share your ideas with your friends, family, or colleagues, and ask for their feedback. This will help you identify potential flaws and refine your idea.
- Conduct Market Research
Analyze the competition, target audience, and market trends to validate your idea and make sure it has the potential to succeed.
By following these tips, you’ll be able to come up with a clear and unique app idea that has the potential to succeed in the market.
Step 2: Plan Your App
Before you start developing your app, planning it out thoroughly is essential. Proper planning helps you to identify potential issues and avoid costly mistakes during development. By planning your app, you can ensure that it meets your expectations and is aligned with your business goals.
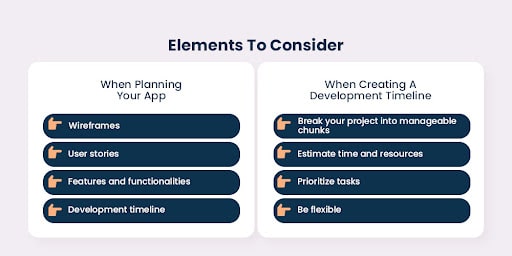
There are several elements to consider when planning your app, including.
- Wireframes
Wireframes visually represent your app’s user interface. They help you map out your app’s layout and structure, including buttons, menus, and screens.
- User Stories
User stories describe how users will interact with your app. They help you to understand the user’s perspective and identify potential issues.
- Features and Functionalities
List all the features and functionalities you want your app to have. This list will help you prioritize your development efforts and ensure your app meets your requirements.
- Development Timeline
A development timeline outlines your app’s development and sets realistic deadlines for each stage. It helps you to track progress, set expectations, and avoid delays.
When creating a development timeline, here are some tips to remember:
- Break Your Project Into Manageable Chunks
Divide your app development into smaller, more manageable pieces, such as UI design, backend development, testing, and deployment.
- Estimate Time And Resources
Estimate how long each stage will take and what resources you need, including team members, software, and hardware.
- Prioritize Tasks
Prioritize tasks based on their importance and complexity. This will help you allocate resources and ensure critical tasks are completed on time.
- Be Flexible
Be prepared to adjust your timeline as needed. Unexpected issues can arise during development, and flexibility and adaptability are essential.
Following these steps and creating a detailed plan ensures that your app development runs smoothly and efficiently, leading to a successful launch.
Step 3: Choose Your App Development Approach
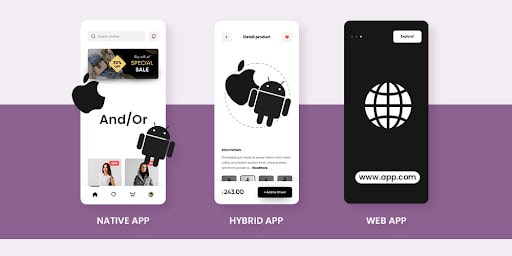
Regarding app development, there are three main approaches: native, hybrid, and web. Each process has its own advantages and disadvantages, and the best choice depends on your app’s specific needs. Let’s look at them one by one.
- Native App Development
Native apps are developed specifically for a particular platform, such as iOS or Android. They are built using platform-specific programming languages, such as Swift or Java.
Pros: Native apps provide a superior user experience optimized for the specific platform. They also offer better performance and functionality, with access to the device’s hardware and software features.
Cons: Native apps can be costly and time-consuming, requiring specialized expertise and development for each platform separately. Also, maintenance and updates can be complex, as any changes need to be made independently for each platform.
- Hybrid App Development
Hybrid apps are built using a combination of web technologies, such as HTML, CSS, JavaScript, and native code. They are essentially web apps packaged within a native app wrapper.
Pros: Hybrid apps are more cost-effective than native apps, requiring less time and effort. They also offer cross-platform functionality, as the same code can be used for multiple platforms.
Cons: Hybrid apps can have performance issues compared to native apps, as they are not optimized for each platform. Also, they can have limited access to device features compared to native apps.
- Web App Development
Web apps are accessed through a web browser and are not installed on the device like native or hybrid apps. They are built using web technologies like HTML, CSS, and JavaScript.
Pros: Web apps are the most cost-effective option, as they do not require specialized expertise or development for different platforms. They are also easily accessible, as users can access them through a web browser.
Cons: Web apps have limited functionality and performance compared to native or hybrid apps. They also require a constant internet connection, which can be a drawback in some situations.
To choose the best approach for your specific app idea, consider your budget, timeline, target audience, and app requirements. If you have a large budget and need maximum performance and functionality, native app development may be the best option.
Hybrid app development may suit a smaller budget and cross-platform functionality. A web app may be the best option if your app is more content-focused and does not require complex functionality. Ultimately, the approach choice depends on your app’s specific needs and requirements.
Step 4: Design Your App
App design plays a crucial role in the success of an app. A visually appealing and intuitive design can significantly enhance the user experience and engagement, leading to better reviews and increased downloads.
Here are some tips for designing your app:
- Keep It Simple
A cluttered and complex design can overwhelm users and make it challenging to navigate your app. Keep your design simple and intuitive, with clear navigation and a logical flow of information.
- Use a Consistent Theme
Consistency is key in app design. Use a consistent color scheme, typography, and visual elements throughout your app to create a cohesive and professional look.
- Prioritize User Experience
The user experience should always be at the forefront of your design decisions. Ensure your app is easy to use and understand, with intuitive navigation and clear calls to action.
- Get Feedback
Feedback from users or beta testers can be invaluable in refining your app design. Consider conducting user testing to gather feedback and make improvements to your design.
Several tools are available for app design, including Figma, Sketch, and Adobe XD. These tools allow you to create wireframes and prototypes of your app, test different designs, and collaborate with your team. Choose the tool that best suits your needs and level of expertise.
Overall, a well-designed app can greatly enhance the user experience and engagement, leading to increased downloads and better reviews. Take the time to plan and design your app to ensure its success carefully.
Step 5: Develop Your App
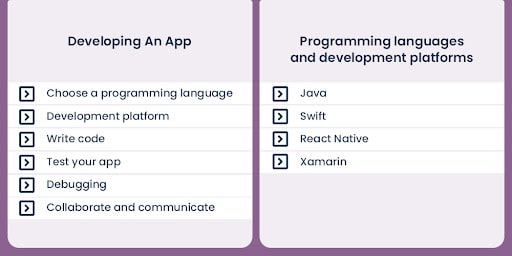
Developing an app involves several stages, including coding, testing, and debugging. Here’s a brief overview of the development process:
Choose a Programming Language And Development Platform
Several programming languages and platforms are available for app development, each with strengths and weaknesses. Choose the one that best suits your app idea and level of expertise.
- Write Code
Coding is the core of app development. Write clean and efficient code to ensure that your app runs smoothly and without errors.
- Test Your App
Testing is a crucial part of the development process, as it helps you identify and fix bugs before releasing your app to the public. Test your app thoroughly on different devices and operating systems to ensure it works as intended.
- Debugging
The process of identifying and fixing errors in your code. Use debugging tools and techniques to identify and fix any issues with your app.
- Collaborate And Communicate
App development is rarely a one-person job. Collaborate with your team members, designers, and stakeholders to ensure everyone is on the same page and working towards the same goal. Communication is key during the development process.
Regarding app development, several programming languages and development platforms exist, including
- Java
- Swift
- React Native
- Xamarin
Choose the one that best suits your app idea and level of expertise.
In addition, collaboration and communication are crucial during the development process. Use project management tools like Trello or Asana to keep everyone on the same page, and communicate regularly with your team members and stakeholders to ensure that everyone is aware of any updates or changes to the app.
Removing all the hassle of these complicated procedures are the no-code mobile app builders. They have revolutionized the mobile app development process as it provides the ease of creating a mobile app with simple and easy drag and drop functionality.
Let’s dig deep into the details to build a mobile app without coding.
No-Code Mobile App Builders – Revolutionizing Mobile App Development Process
No-code mobile app builders have revolutionized mobile app development, making it easier and more accessible to create apps without complex coding skills. This milestone in mobile app development has opened up a whole new world of possibilities for entrepreneurs, small business owners, and even individuals looking to create their apps.
With no-code mobile app builders like MageNative, anyone can create their app by dragging and dropping pre-built components and templates without writing a single line of code. This has reduced the barrier to entry for app development and made it more affordable and efficient.
Why a no-code mobile app builder
- Cost-Saving
No-code mobile app builders are significantly cheaper than hiring a professional developer.
- Time-Saving
They allow users to create an app in hours or days rather than weeks or months.
- Easy To Use
They are user-friendly and require no coding knowledge, making it accessible for anyone to create an app.
- Customizable
Despite not requiring coding knowledge, no-code mobile app builders offer a range of customization options.
No-code mobile app builders offer a significant milestone in mobile app development. With no code mobile app builders, anyone can create an app and bring their ideas to life.
Step 7: Launch Your App
Launching your app on app stores such as the Apple App Store or Google Play Store is vital in bringing your app to the public. Here are some steps to follow when launching your app:
- Register As a Developer
To publish your app on app stores, you must register with the respective app store. This typically involves paying a fee and agreeing to the app store’s terms and conditions.
- Submit Your App
Once you’ve registered as a developer, you can submit your app to the app store for review. The review process can take several days to weeks, depending on the app store.
- Optimize Your App Store Listing
Optimizing your app store listing is crucial to increase downloads and user engagement. This includes writing a compelling app description, selecting relevant keywords, and creating visually appealing screenshots and videos.
- Launch Marketing And Promotion Campaigns
Marketing and promotion are crucial to noticing your app in a crowded app store market. Use email marketing, social media, and other channels to promote your app and build a community of users.
- Gather Feedback And Make Improvements
After launching your app, gathering feedback from users and improving your app is essential. Consider implementing user feedback and releasing regular updates to improve the user experience.
Launching your app is just the beginning. Promoting and improving your app continuously is important to increase downloads and user engagement. Use email marketing, social media, and other channels to build a community of users and gather feedback to improve your app over time.
Conclusion
In conclusion, making your own app is achievable for beginners with the right guidance and tools.
Here are the main points covered in this guide:
- Define your app idea and conduct market research to validate it.
- Plan your app by creating wireframes and user stories and creating a development timeline.
- Choose the best app development approach for your specific app idea.
- Design your app with user experience and engagement in mind, using tools such as Figma or Sketch.
- Develop your app by coding, testing, debugging, and collaborating with others.
- Launch your app on app stores such as the Apple App Store or Google Play Store, and optimize your app store listing.
- Continuously improve your app by gathering user feedback and releasing regular updates.
Remember, making an app is achievable for beginners with the right guidance and tools. Don’t be afraid to start working on your own app idea, and use this guide as a roadmap to help you along the way.

